Freshbooks is one of the widely used accounting software, and they also have a REST API, so a developer can implement an integration from any system that they can write code in.
In this article, I’m going to explain how to implement a Salesforce-Freshbooks integration using the Declarative Webhooks application from Appexchange with callout templates and callout sequences without using a single line of code.
The plan is to create an invoice in Freshbooks every time a Salesforce opportunity changes status to ‘Closed Won’. But the Salesforce account might not be in Freshbooks yet, so before making the call to create an invoice, we need a call to create a Freshbooks client if it doesn’t exist. After creating an invoice, we want to send it.
Let’s find out how we can implement that.
Setting up the Freshbooks API connection
Before being able to make API calls to Freshbooks’ REST API, we need to authenticate into Freshbooks. Freshbooks’ API uses OAuth to authenticate, so we’re going to use Named Credentials and a custom Authentication Provider. I’m not going to dwell too much on this step, but for the custom Authentication Provider, we basically have 2 options:
- We can write the AuthProviderPluginClass class ourselves, using the Freshbooks API documentation and Salesforce documentation (https://developer.salesforce.com/docs/atlas.en-us.apexref.meta/apexref/apex_class_Auth_AuthProviderPluginClass.htm)
- Or we can install the connection from the Declarative Webhooks code library. That will install the class and custom metadata, and we can set up the Authentication Provider and Named credentials using that. Contact Omnitoria for this option.
Creating Freshbooks callout templates
At the heart of Declarative Webhooks, there are Callout templates. A callout template (or connection) is the definition of a REST API call, where you can decide where to call, what action and what data to send. So we need 3 callout templates for this implementation.
Create Freshbooks Client
This template uses the /accounting/account/XXXXX/users/clients POST call from the Freshbooks REST API to create a client.
- Since we’re using the named credentials, the template URL will look like this: callout:Freshbooks/accounting/account/XXXXX/users/clients. We’re also going to set the Main Object as Contact.
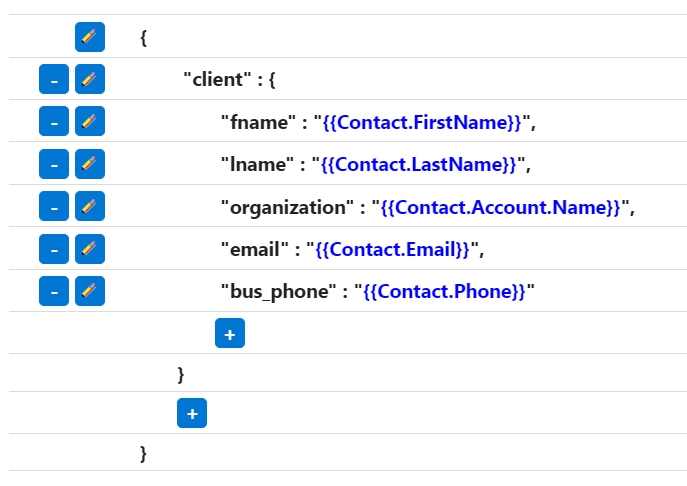
- The body of the callout should look like below, where we are mapping the basic information of the contact into the request body:
- And since we want to use the response to save the Freshbooks client id in Salesforce, we will define the response body like this:
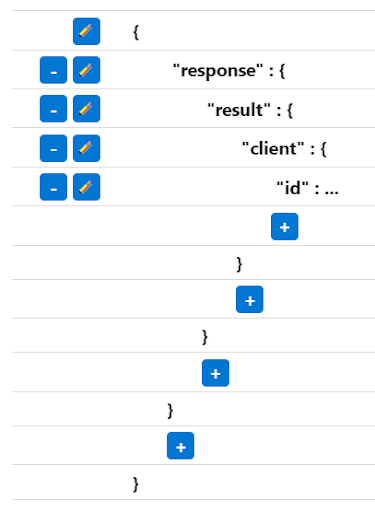
- The last step in the Callout Template wizard is to define a response action. We want to save the client id in Salesforce, so we’re going to choose to update the main record, by mapping the id into a Salesforce field:

Create Freshbooks Invoice
Another callout template that we need to implement is the one for creating an invoice based on Opportunity details. We will create one that uses the /accounting/account/XXXXX/invoices/invoices REST POST call.
- Just like before, we set the URL to something like callout:Freshbooks/accounting/account/YGV13/invoices/invoices, but this time, the main object of the template is going to be Opportunity.
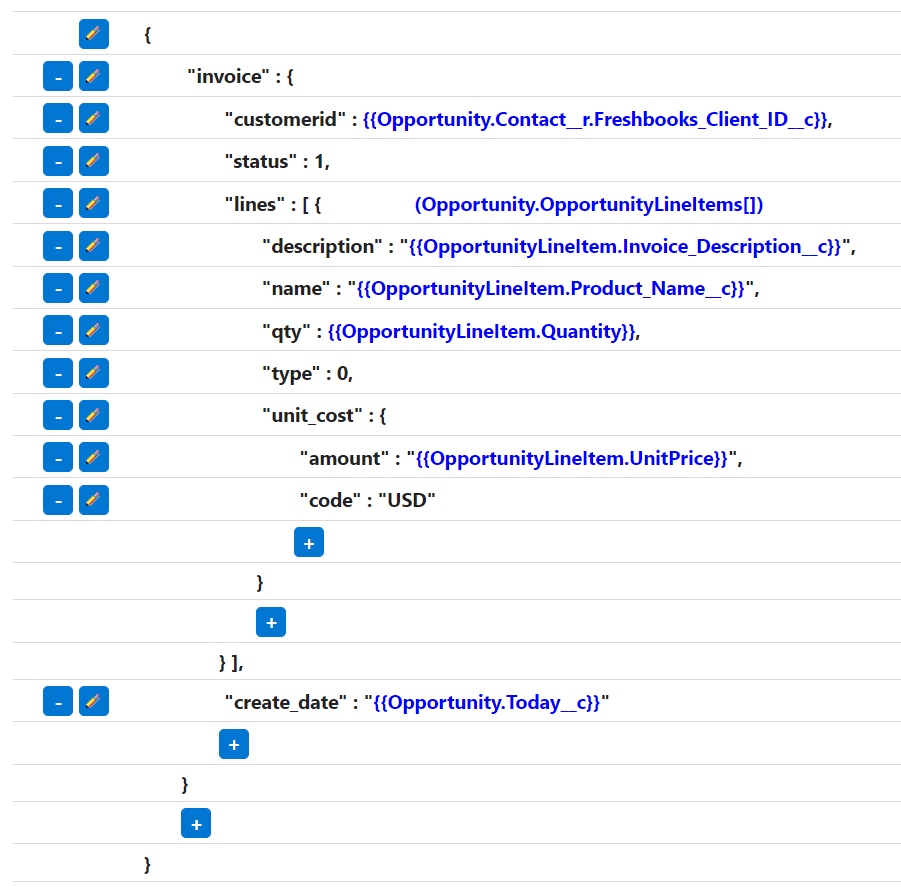
- The request body for this call is a bit more complex because we are also mapping Opportunity Products:
- The response body is also a bit more complex, because we want to save not only the id, but the invoice number and status as well:
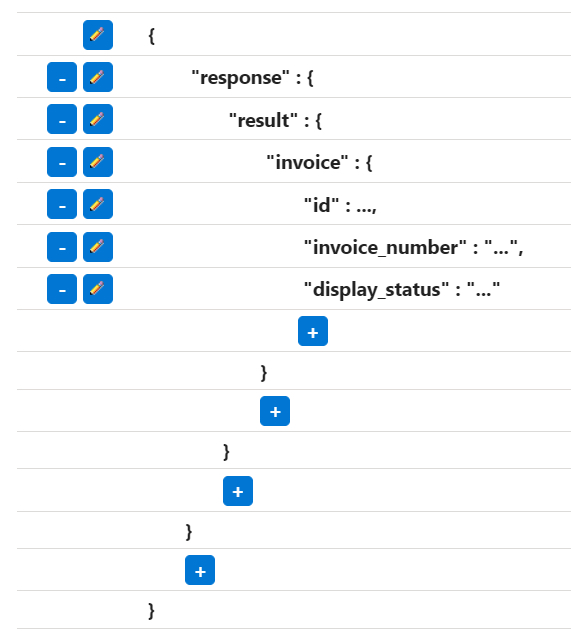
- As a response action, instead of updating the main record, we want to create a new record of type Freshbooks_Invoice__c:

Send Freshbooks Invoice
The last template we’re going to use is a call to send the invoice to the client. For this, we’re using the PUT call to /accounting/account/XXXXX/invoices/invoices/[INVOICEID] to update the invoice with the action_email set to true.
- The URL used this time is callout:Freshbooks/accounting/account/YGV13/invoices/invoices/{!Freshbooks_Invoice_ID__c} . That will map the Freshbooks_Invoice_ID__c field from Freshbooks_Invoice__c object into the URL. The Main Object is this time set to “Freshbooks_Invoice__c”
- The request body is very simple. We just need to set the action_email to true:
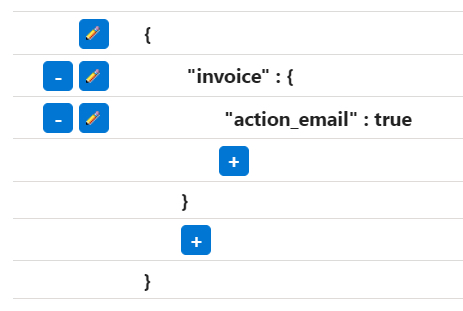
- The response body can be left empty this time, as we don’t need to map anything back
- As a response action, we can simply update the main record and set the Status__c field to “sent”:

Making the API calls to Freshbooks
Now that we have all the templates created and active, we need a way to automate the calls. We now have 3 calls to make in a sequence, so we need to define a Callout Sequence.
To do that, we go to “Callout Sequences” tab in “Declarative Webhooks” app and create a new sequence. We fill in a name, we set the main object (or starting object) to Opportunity and we click “Save and Continue”

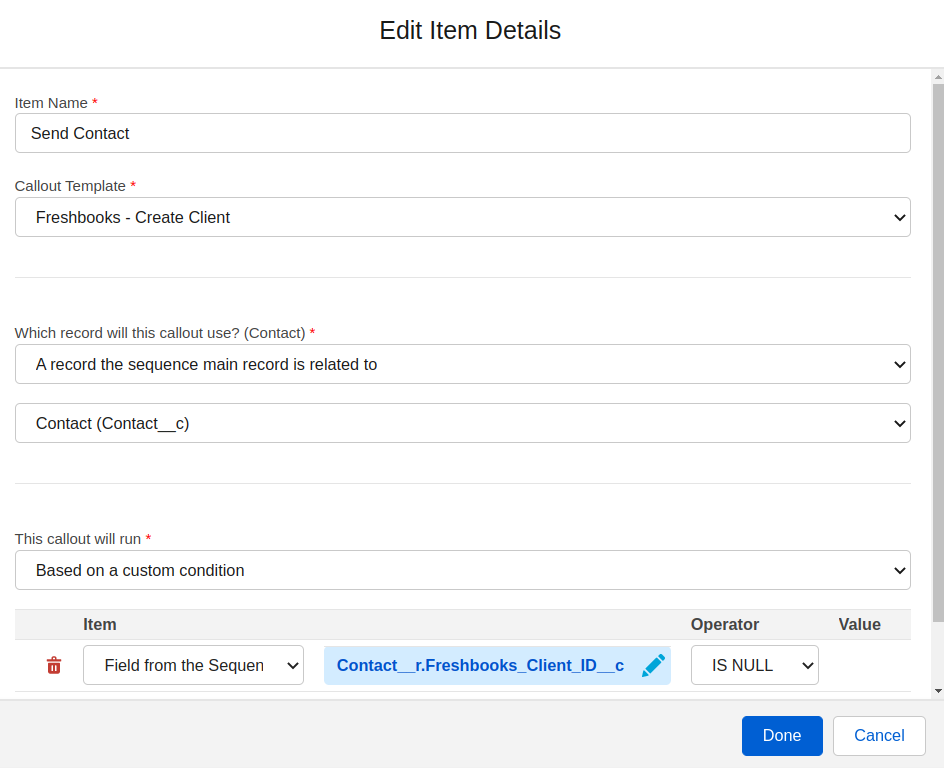
In the second page we need to define what calls to make and in which order. First, let’s click the plus button to add the Create Contact call. We should make this call only if the Contact doesn’t have a Freshbooks Id already. The form should look like below:
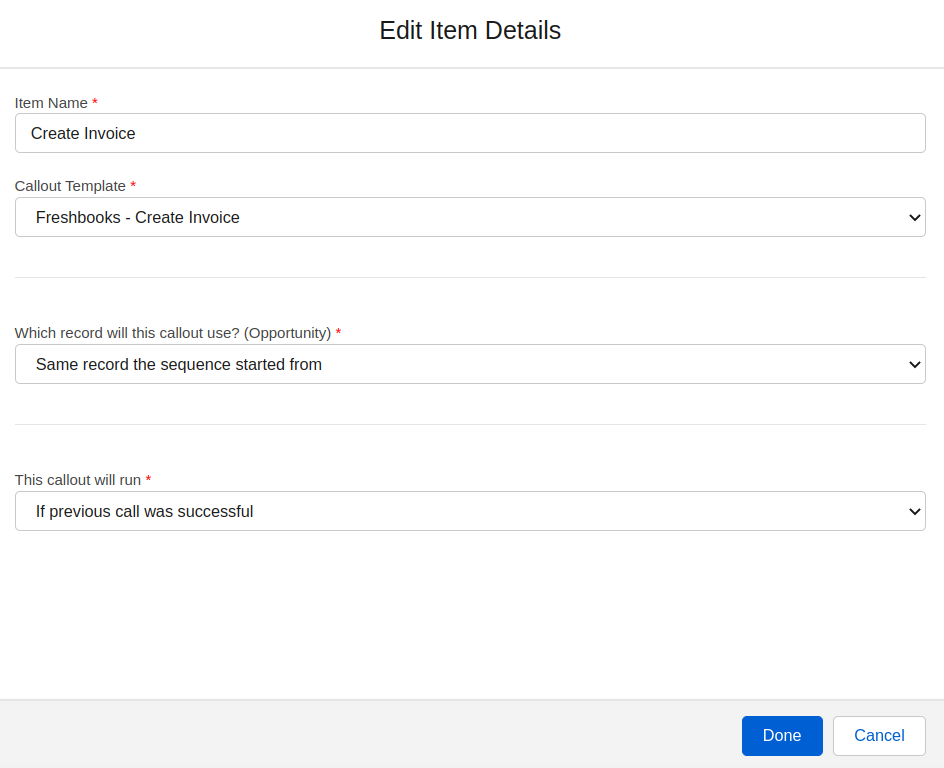
After clicking “Done”, we should add the second call by clicking the plus button below the Send Contact call. We want to make this call if the previous one was successful. The form should look like this:
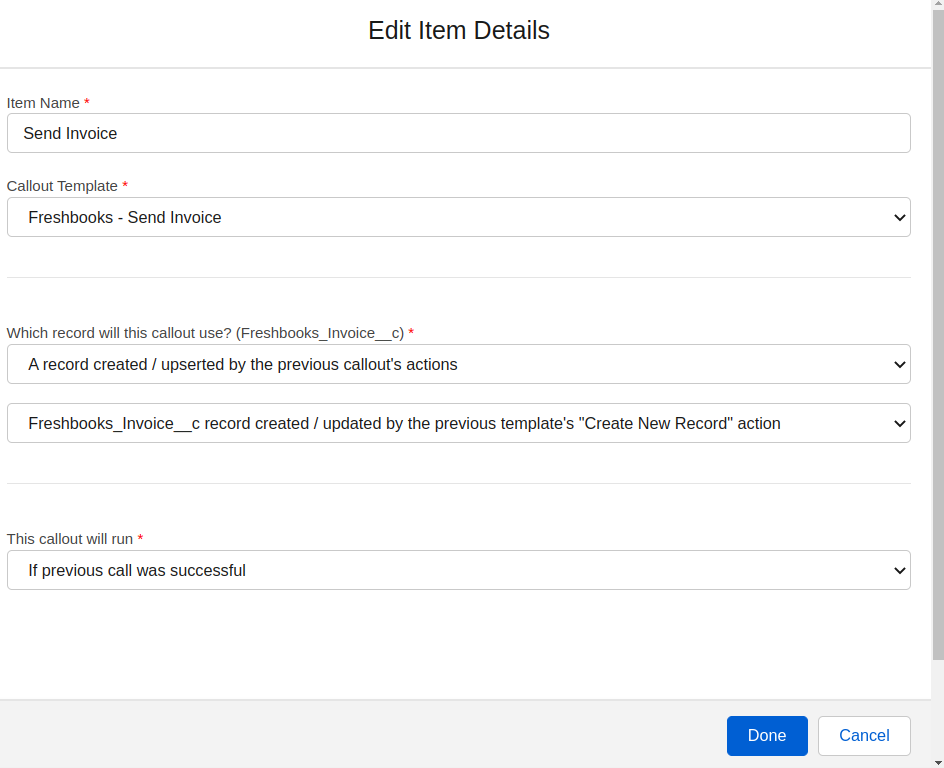
The third call we want to make is the “Send Invoice” call. This one uses the Freshbooks_Invoice__c record that was created by the previous call.

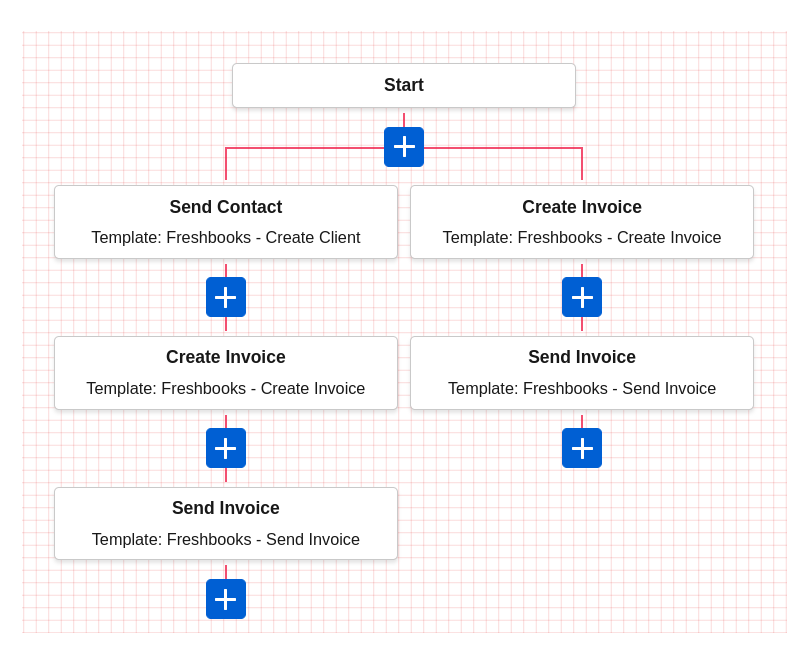
OK, now we’ve created the “Client does not exist in Freshbooks” branch in the sequence. Everything we defined so far happens when the client is not already in Freshbooks. Now, to define the “Client exists in Freshbooks” brach, we click on the plus button right below the “Start” block. That will create a new branch starting right before the existing first call. Now we use use the “Create Invoice” template directly, but his time we set the conditions to run only if the Client has a Freshbooks Id.
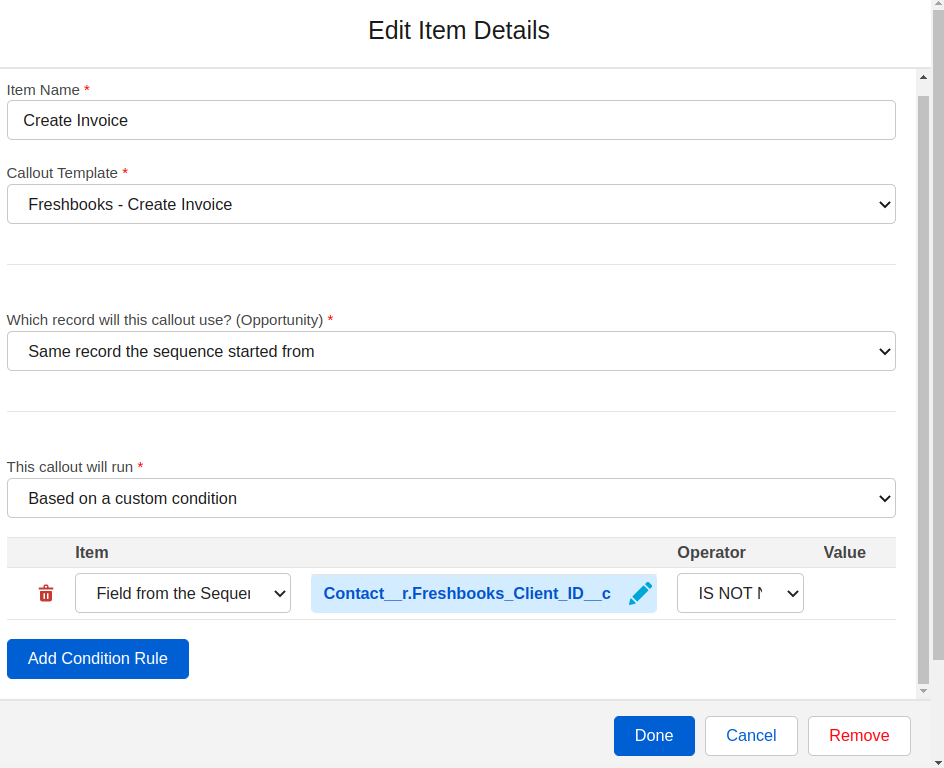
Afterwards, like like in the other branch, we add the final “Send Invoice” call:
After adding all these steps, the sequence should look line the image below. In case the client doesn’t have a Freshbooks Id, it will go the left side branch, and i the client has a Freshbooks Id already, it will go down the right side branch.
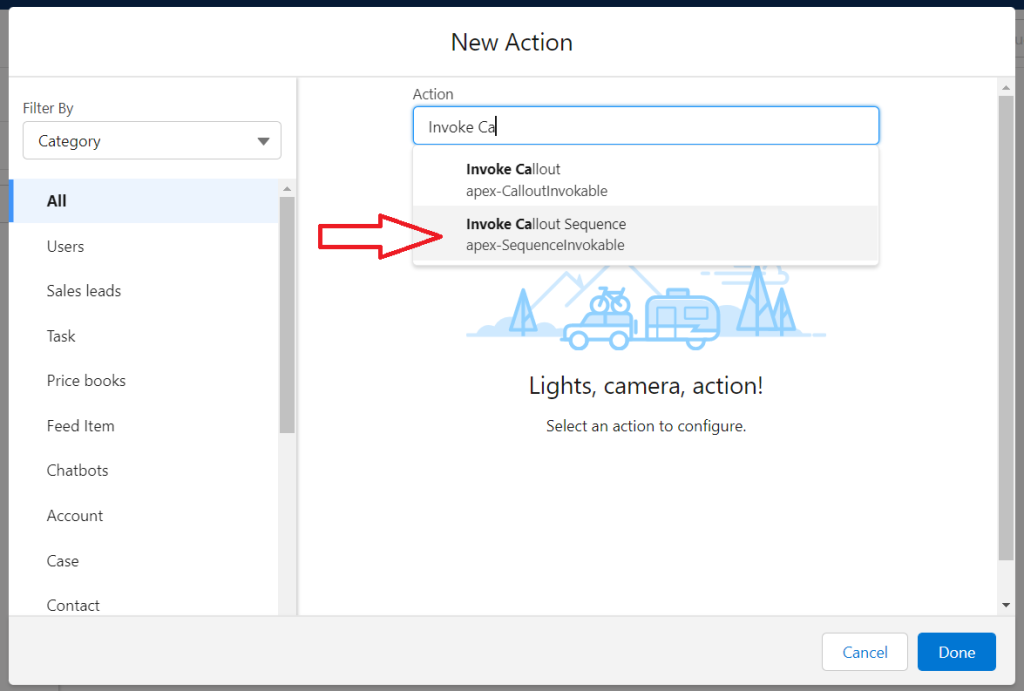
Now we save the Callout Sequence we created and we can initiate it every time an Opportunity moves to ‘Closed Won’. We will do that by creating a flow that runs every time the Status changes to ‘Closed Won’ and add the “Invoke Callout Sequence” action.
You will need to know your Callout Sequence ID. You can identify your Callout Sequence ID under the Administration tab – Callout Sequences subtab in the Declarative Webhooks app. Review the record ID associated with your sequence. This is your Callout Sequence ID.

Final thoughts
This is it. Now the flow will initiate the sequence, which will use the ‘Create Client’ callout template (if needed). Then it will start the second call, which will use the ‘Create Invoice’ template, and finally, the third step will use the ‘Send Invoice’ callout template.
Thank you for following this quick guide.
If you want to learn more about Declarative Webhooks, please follow the links below:
More Integration Guides
© Omnitoria, All Rights Reserved.