Are you looking for an efficient way to connect external systems with Salesforce and make data easily accessible to your team through a conversational interface?

By leveraging Declarative Webhooks and Einstein Copilot, you can set up an integration framework facilitating HTTP callouts to external systems, such as Jira, within Salesforce. This setup allows users to retrieve information from REST APIs and bring those results into Salesforce through natural language queries.
In this post, we’ll walk through the steps to integrating Salesforce with external systems using Declarative Webhooks which enables point-and-click configuration of callouts easily in a few clicks.
We’ll begin by creating an outbound callout template to retrieve relevant data from a specified Jira project. Then we’ll use Einstein Copilot, Salesforce’s conversational AI assistant, to expose that data to end users in a user-friendly way through a custom Copilot action.
The first component is Declarative Webhooks, a robust Salesforce app that enables point-and-click configuration of inbound and outbound webhooks and includes other advanced features such as logging, retry, and callout sequences.
With Declarative Webhooks, you can create an Outbound Callout Template that will query the Jira REST API when prompted, searching for issues that match certain criteria–such as in-progress issues based on predefined criteria like the Project Key.
If you’re eager to see what we’ll be building before diving into the guide, check out our video demo showcasing the final product in action:
Jira REST API and Project Setup
Jira is a popular project management tool used by software development teams to track issues, bugs, and feature requests. Follow through the process of signing up for a Jira trial, setting up user permissions, obtaining an API token, creating a sample project, and creating issues with different statuses.
Sign Up for a Jira Trial
Go to the Atlassian website and click on the “Get it free” button.
Fill in the required information, including your email address, full name, and password.
Click on “Sign up” to create your Jira account.
Give Necessary Permissions to Your User
Log in to your Jira account and navigate to the “User Management” section.
Find your user account and click on it to edit the permissions.
Ensure that your user has the necessary permissions to create projects, issues, and access the API. The required permissions may vary depending on your specific needs.
Get the API Token
Click on your user avatar in the top-right corner and select “Account Settings.”
In the left sidebar, click on “Security” and then “Create and manage API tokens.”
Click on the “Create API token” button and give your token a descriptive name.
Copy the generated API token and store it securely, as you won’t be able to view it again.
Create a Sample Software Project
In Jira, click on “Projects” in the top navigation bar and then click on “Create Project.”
Choose “Software Development” as the project template and click “Next.”
Enter a name for your project, such as “Sample Software Project,” and click “Create.”
Create Issues for the Project
Within your newly created project, click on “Create” in the top-right corner to create a new issue.
Fill in the required information, such as the issue type (e.g., bug, task, story), summary, description, and assignee.
Set the issue status according to your project’s workflow (e.g., “To Do,” “In Progress,” “Done”).
After you are done, here’s how your Jira board should look like:
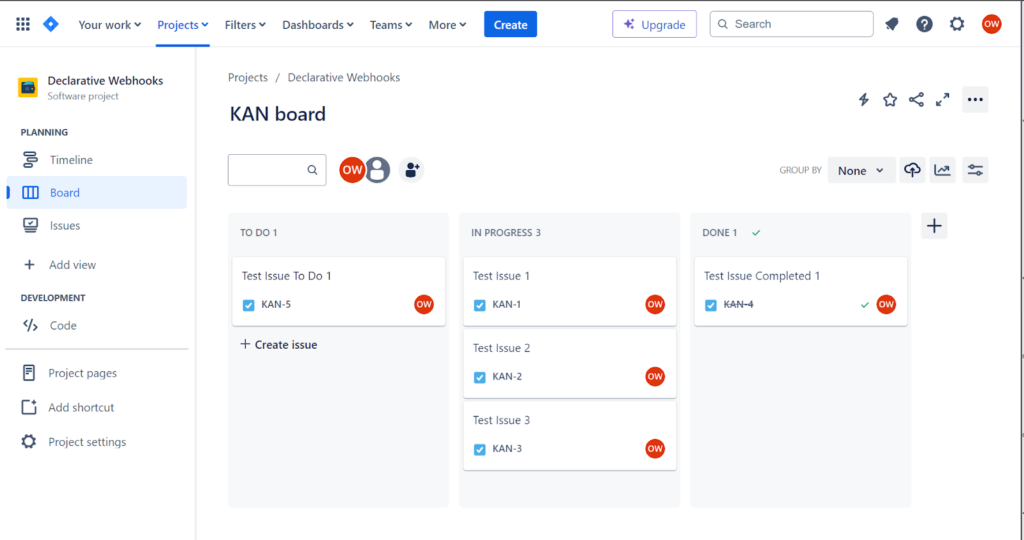
HTTP Callout Setup using Declarative Webhooks to Query In Progress Issues in Jira
Make sure you have the latest version of Declarative Installed. After we get our API token from Jira, we need to create a callout template, a flow and a copilot action that will be used by Einstein.
We will create GET request to query in progress issues and your URL for this use case should look like this:
https://your-domain.atlassian.net/rest/api/3/search?jql=project=”{ProjectKey}” and status=”In Progress”
Be sure to replace “your-domain” with your actual Atlassian domain name. For authentication, you’ll need to generate an API token in Jira and provide it along with your Jira login email in the Authentication section of the Callout Template.
Choose Basic Authentication where username will be your jira email address and password will be your API token.
In the Callout Template’s Request Body section, you can leave the fields blank, as we are just performing a GET request to retrieve data, not posting any information.
In the Response Body section, click Generate from Sample JSON and paste in an example of the JSON response you receive when making this API call, which allows Declarative Webhooks to parse the response data.
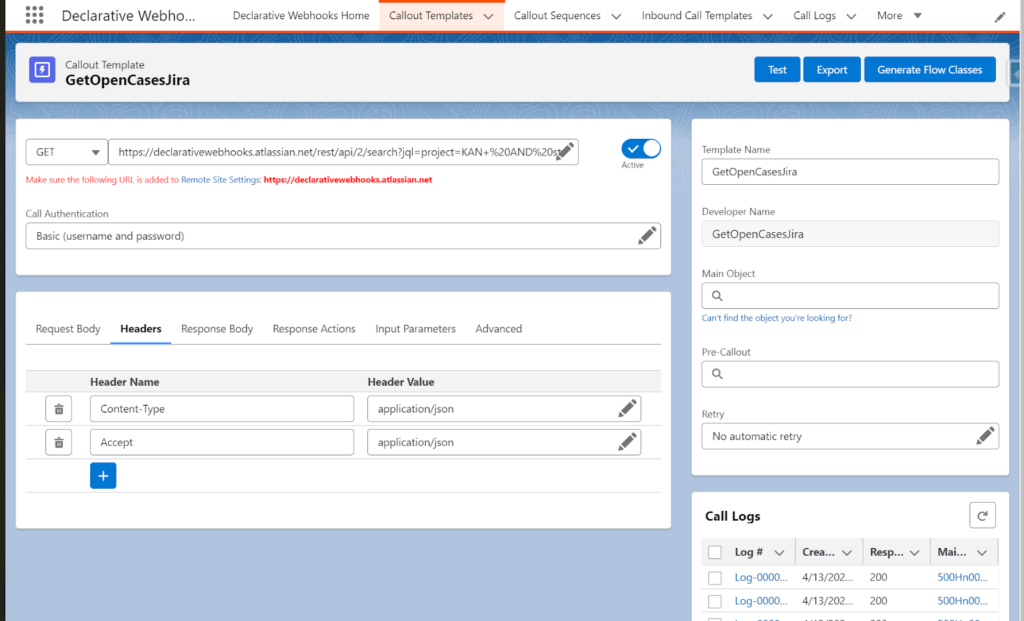
Make sure you add your domain URL to the Remote Sites in Setup inside Salesforce and activate the template.
Salesforce Einstein Copilot Setup

This link should take you directly to the trial registration page specifically for Salesforce Einstein Copilot. Ensure that all the information is accurate to avoid issues with the trial setup.
Once all fields are filled, review the information, and click on the submit or register button.
You will receive an email to confirm your email address and to continue the setup process.
Activate Your Account
Open the email from Salesforce and click on the activation link provided.
Set your desired password and security questions for your Salesforce account.
Log In to Your Trial Org
After activation, log in to your new Salesforce trial organization where you can start configuring Einstein Copilot.
- Enter “Einstein Generative AI” in the Quick Find box.
- Select Einstein Generative AI Settings.
- Click on the checkbox to enable Einstein Generative AI.
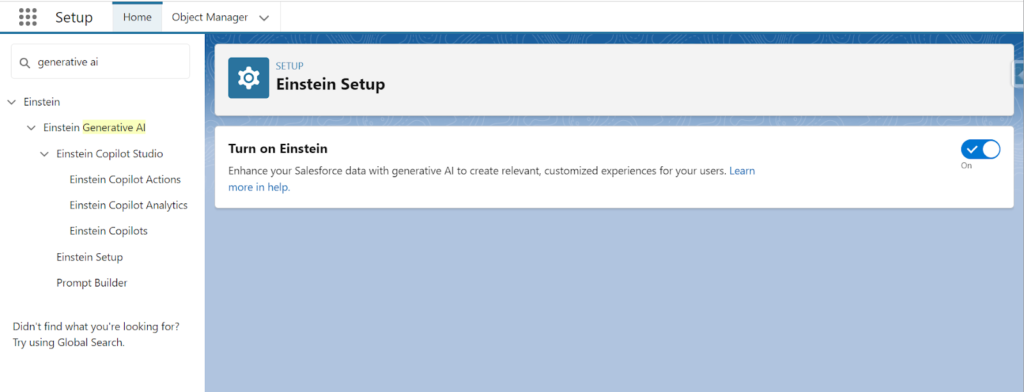
Enable Einstein Copilot
Still in the Setup menu, search for “Einstein Copilot” in the Quick Find box.
Enable Einstein Copilot by toggling the switch or checking the box, depending on the UI.
Configuring Einstein Copilot Permission Settings
Assign Permission Sets:
Go to Users in the Setup menu.
Click on Permission Sets.
Find or create a permission set that includes permissions for “Einstein Generative AI” and “Einstein Copilot”.
Assign this permission set to the desired users by adding users to the permission set.
Verify User Access:
Ensure that users who need to use Einstein Copilot have the correct permissions enabled.
Users should now be able to access the Einstein features from their Salesforce interface.
Capabilities of Einstein Copilot and Prompt Builder
Einstein Copilot in Salesforce leverages AI to assist in various tasks, enhancing productivity by automating routine processes and generating contextual recommendations. Key capabilities include:
Content Generation: Automatically generates emails, chat responses, reports, and more.
Data Insights: Offers predictive insights based on Salesforce data analytics.
Workflow Automation: Simplifies complex business processes by automating steps based on AI decisions.
In our example, we will use Copilot to create a custom Copilot action which will call the appropriate automation, a flow that uses Declarative Webhooks to perform a callout and show the response to the user in a formatted structure.
Prompt Builder is a tool within Einstein Copilot designed for creating and managing AI-generated texts. Its capabilities include:
Custom Prompts: Users can design custom prompts to generate specific outputs tailored to business needs.
Integration with Salesforce Data: Allows the AI to utilize real-time data from Salesforce for personalized content generation.
Template Management: Manage and modify templates for recurring use cases to maintain consistency and quality of outputs.
Salesforce Flow to make HTTP Callout to Jira
Create an autolaunched flow that will be called by Copilot in our example. The first step is calling a Declarative Webhooks action, which calls our outbound template we configured earlier.
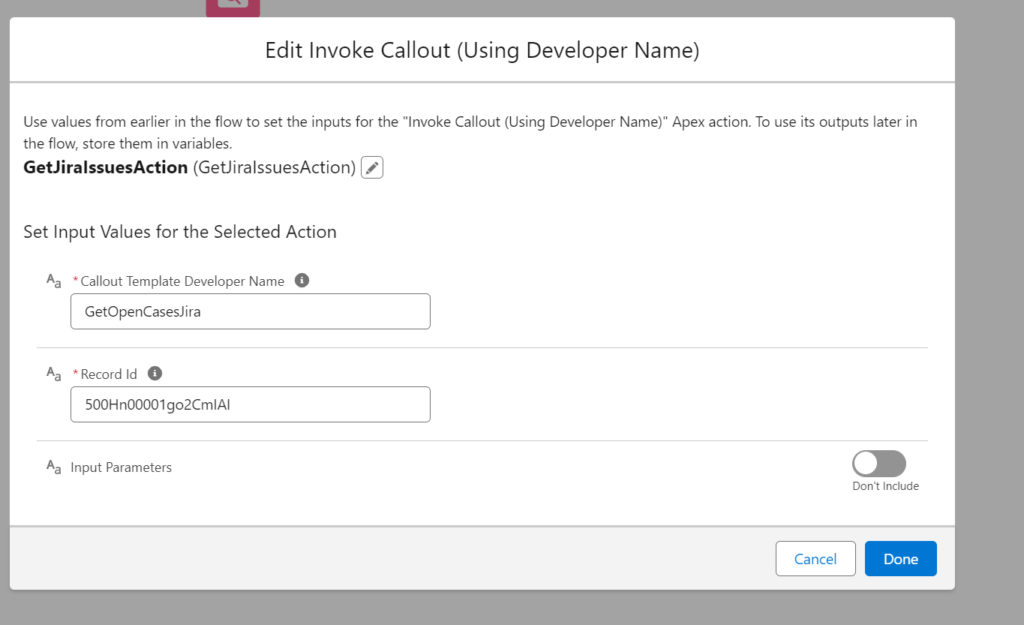
RecordId is a placeholder value for making the callout for our use case. In the second step we will query the Call Logs field since it will contain the JSON response of the callout from the outbound template.
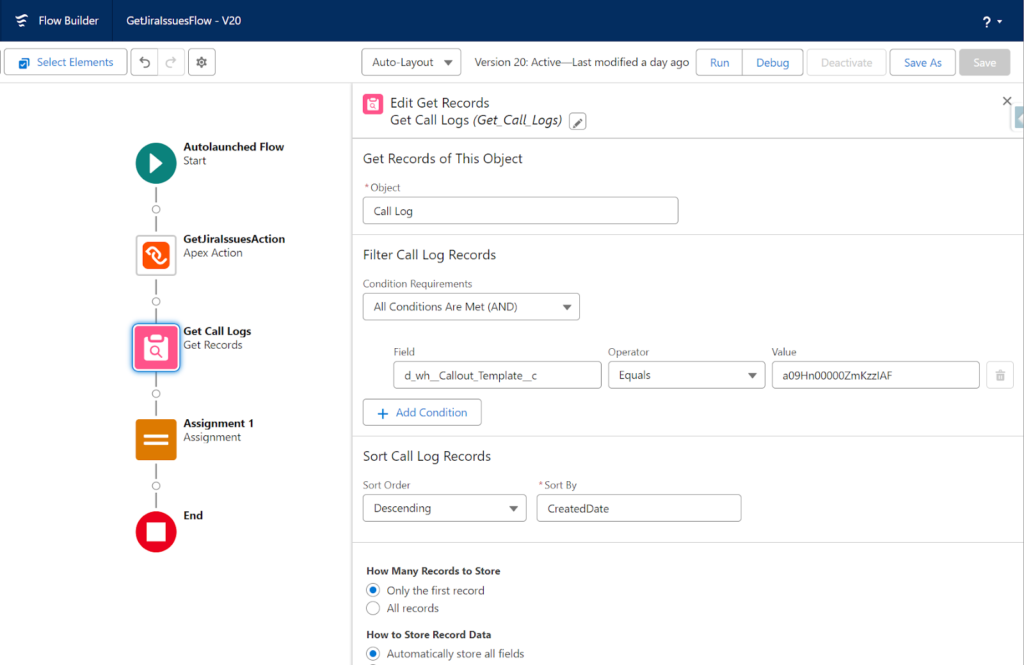
In the next step, we will map this log records ResponseBody custom field to the two variables. One of them will contain the long text value of the JSON string and the other one will be used for formatting a readable response for the user.
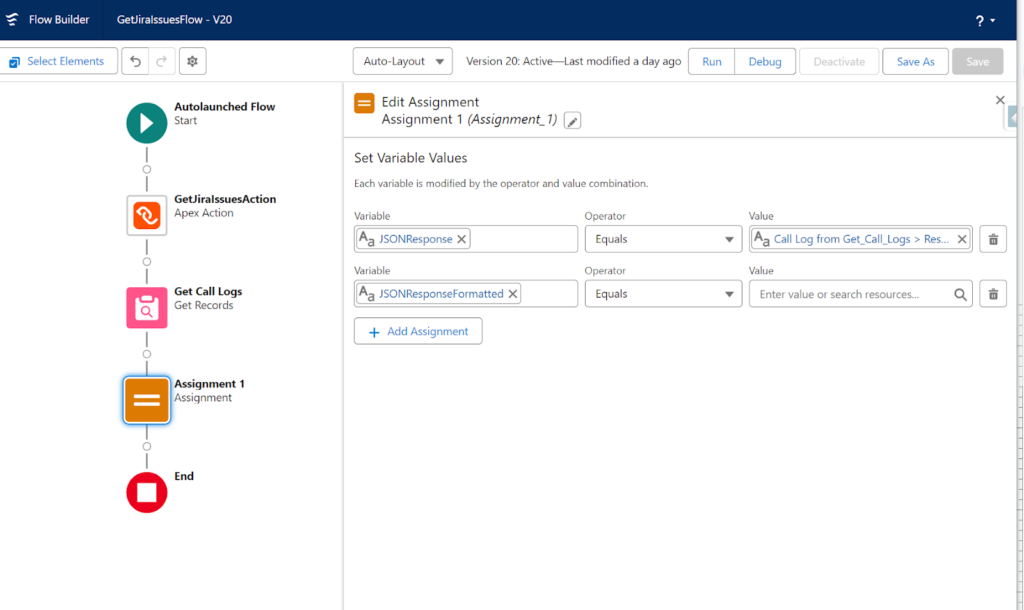
Copilot uses flow description and other description fields in automations, fields for when used. Give a detailed description of the flow which will be mapped to Copilot action later.
Here’s our sample description for this flow:
“GetJiraIssuesFlow is an autolaunched Salesforce Flow that integrates with Jira to retrieve open cases.
The flow utilizes an Apex action named GetJiraIssuesAction to fetch the Jira issues.
The GetJiraIssuesAction is built using a Callout Template with the Developer Name “GetOpenCasesJira”.
This template defines the necessary parameters and the endpoint URL for making the API call to Jira.
When the GetJiraIssuesFlow is triggered, it executes the following steps:
Invokes the GetJiraIssuesAction Apex action.
The GetJiraIssuesAction uses the “GetOpenCasesJira” Callout Template to make an API request to Jira.
The Callout Template specifies the HTTP method (e.g., GET), the endpoint URL, and any required headers or parameters.
Jira processes the API request and returns the open cases based on the specified criteria.
The GetJiraIssuesAction receives the response from Jira and parses the returned data.
The parsed Jira issues data is then made available to the subsequent steps in the
GetJiraIssuesFlow.
The flow can perform further actions with the retrieved Jira issues data, such as creating or updating records in Salesforce, sending notifications, or triggering other processes.”
Einstein Copilot Action Setup
After you enable Einstein AI and activate Copilot, you will see a list of default Copilot actions Salesforce provides out of the box.
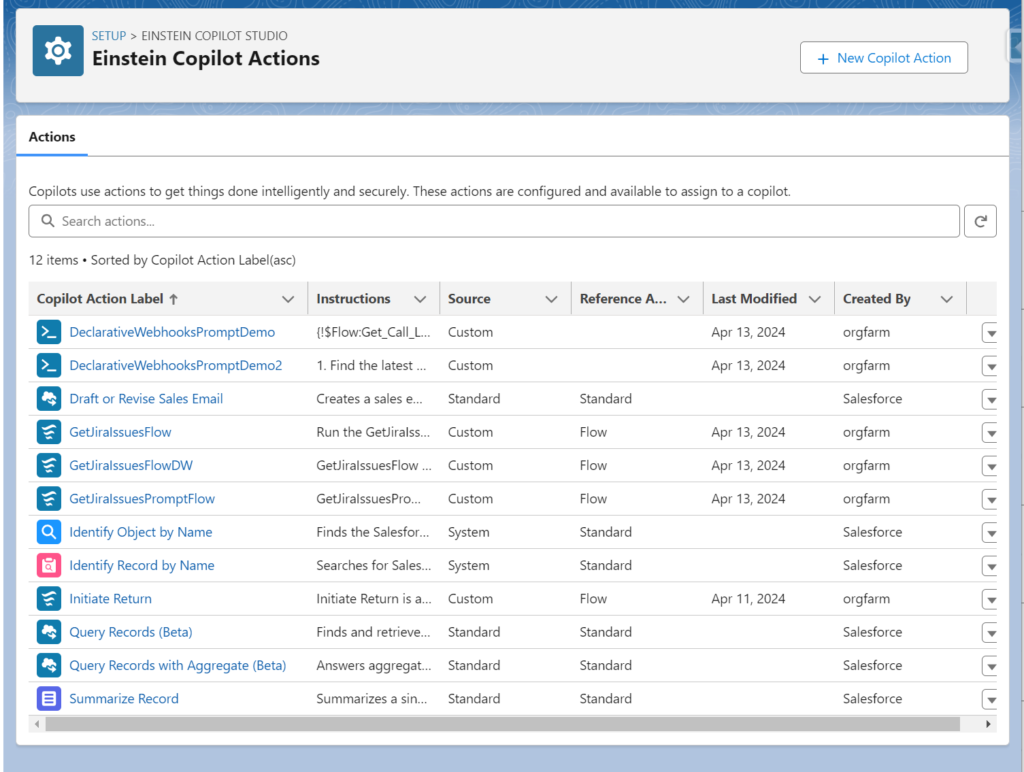
In our scenario, we need to create a custom Copilot action which will call our autolaunched flow when prompted by the user.
We will give instructions on how to use the Output parameters/variable we have defined in our actions page and assign the custom action to Copilot.

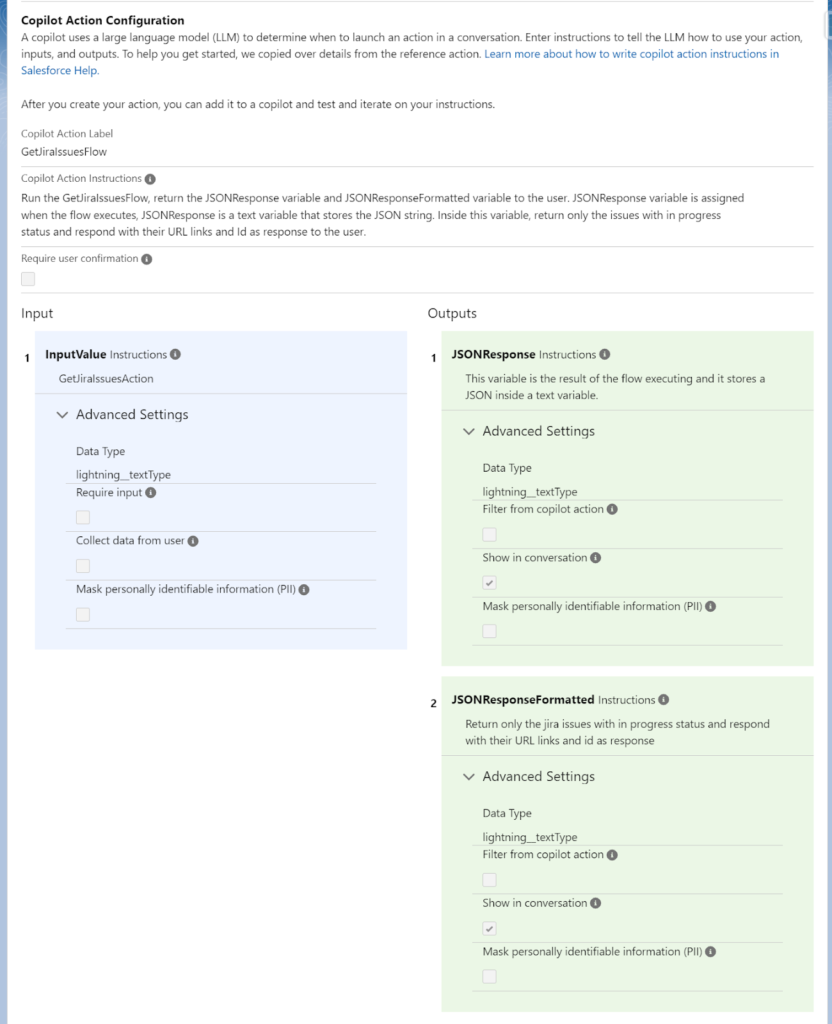
Click on New Copilot Action, Choose Flow as Reference Action Type. Here’s how it should look like:
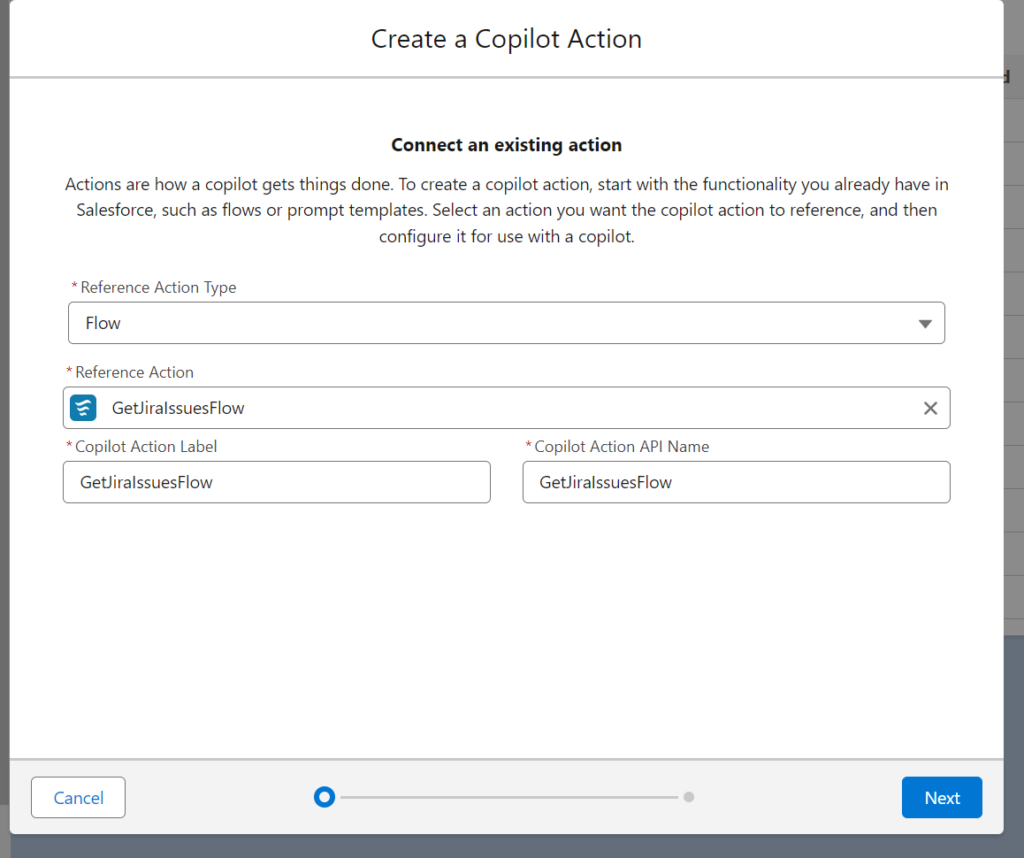
In the instructions screen, the description we have given for our flow is shown in the configuration page.
We recommend using both detailed descriptions for Flows, Flow Actions and Parameters and Copilot Instructions. These will help the AI model to recognize which actions to perform in the Planner tool.
Some of the descriptions you have created in the flow will be auto populated. Remember to check show in conversation checkbox for at least one of the parameters so that the answer will be shown to the user.
Planner is a part of Copilot which can generate and execute a guided set of actions grounded in any business data, from CRM, Data Cloud, or any external source.
After creating the custom action, assign it to your Einstein Copilot while it is deactivated. Whenever you are adding a new action, you need to deactivate the copilot first.
Copilot won’t be accessible to users while deactivated but you can add your custom actions from the Copilot Action Library, add instructions and check the tone of the chatbot and check the session event logs.
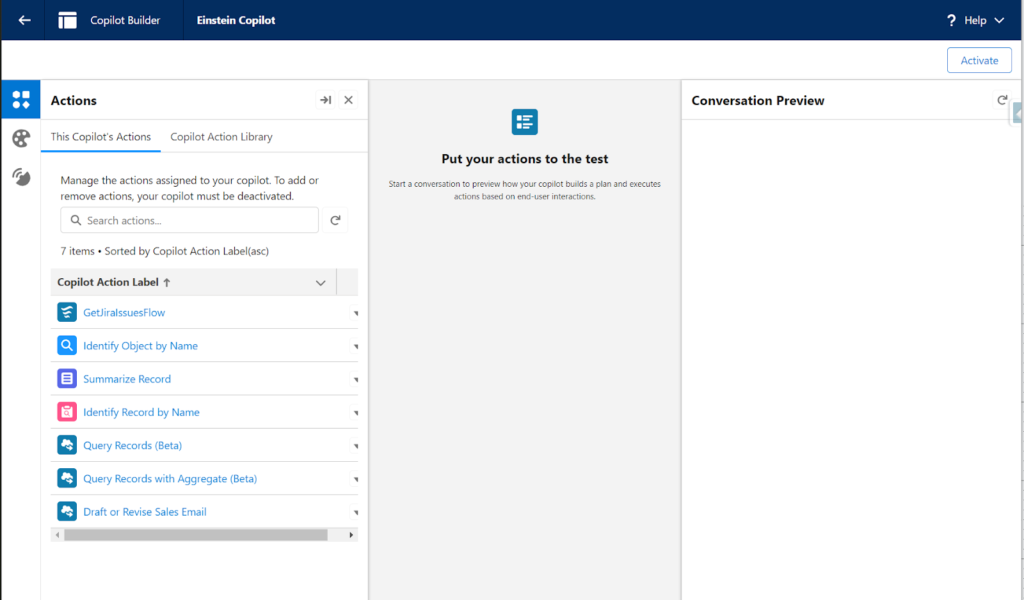
Now all you need to do is Activate Copilot, refresh the page and ask it about the Jira issues!
First, Planner looks for an active automation that can accomplish the task which is our GetJiraIssuesFlow. The output parameters of the flow are then returned to the user.
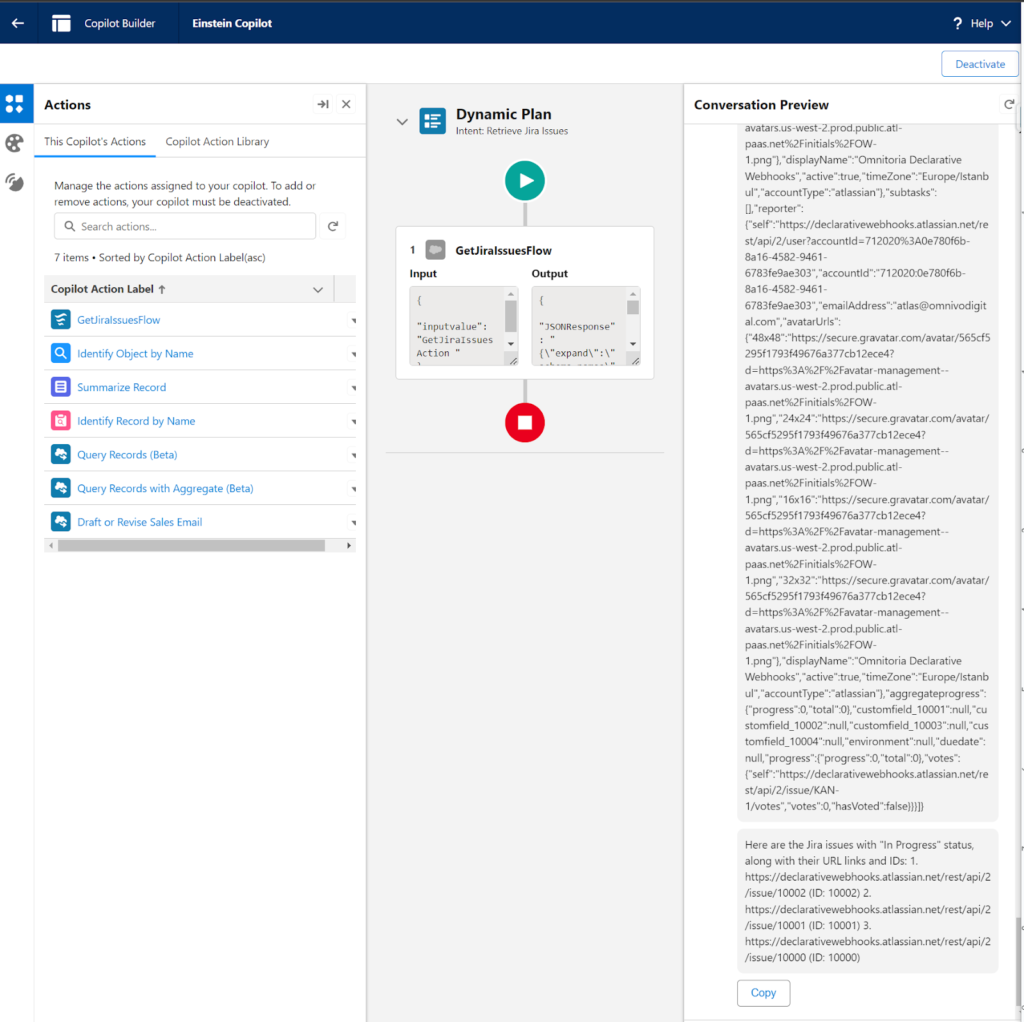
We’ve now completed the setup of a Jira integration using Einstein Copilot and HTTP callouts configured in Declarative Webhooks.
Wrapping Up: Declarative Webhooks & Einstein Copilot Integration for Salesforce
With Declarative Webhooks the possibilities are as much as the technical depth of platforms allows, offering a lot of functionality and use cases for you and your business. By layering in Einstein Copilot’s conversational AI we have seen how we can easily access and manipulate data from external systems within Salesforce through natural language queries.
Whether you’re fetching real-time updates from Jira or interfacing with other external tools, this solution lays a solid foundation for extending Salesforce’s capabilities across your organization.

I hope you enjoyed this guide and I will see you in the next post, stay tuned for more Copilot content!
Thank you for following this quick guide.
If you want to learn more about Declarative Webhooks, please follow the links below:
More Integration Guides
© Omnitoria, All Rights Reserved.