Get Daily Exchange Rates in Salesforce with Declarative Webhooks

Does your company work with multiple currencies in Salesforce and you need up-to-date exchange rates? You can accomplish that without writing a single line of code.
In this tutorial, we’re creating a fully automated and configurable integration to bring daily exchange rates into your Salesforce org.
We are using Declarative Webhooks, an appexchange app you can use to integrate with any REST API, and in this case we are integrating with https://exchangeratesapi.io
Exchange Rates API
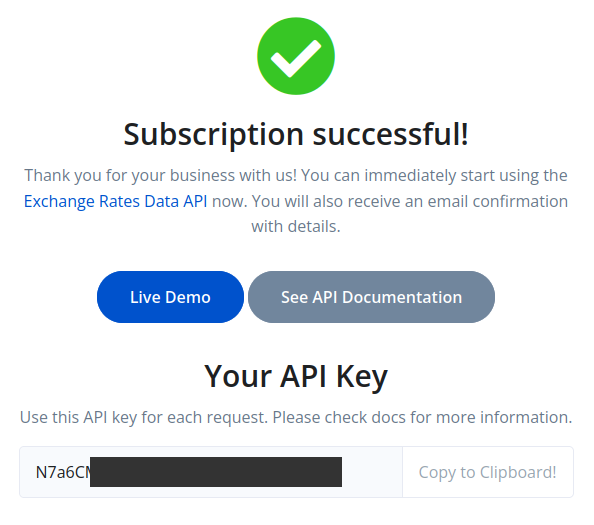
I went to the https://exchangeratesapi.io website and clicked on “Get Free API Key”. The free plan only has 250 calls per month, but it’s enough if we have less than 8 currencies to get conversion rates daily. After registering, I was redirected to APILayer and got my free API Key.
Now, looking at the API documentation, I can see that I can use the /convert call to get the conversion rate between 2 currencies, so I’ll implement that call in Declarative Webhooks.
But first, we need a little setup in Salesforce.
Custom object
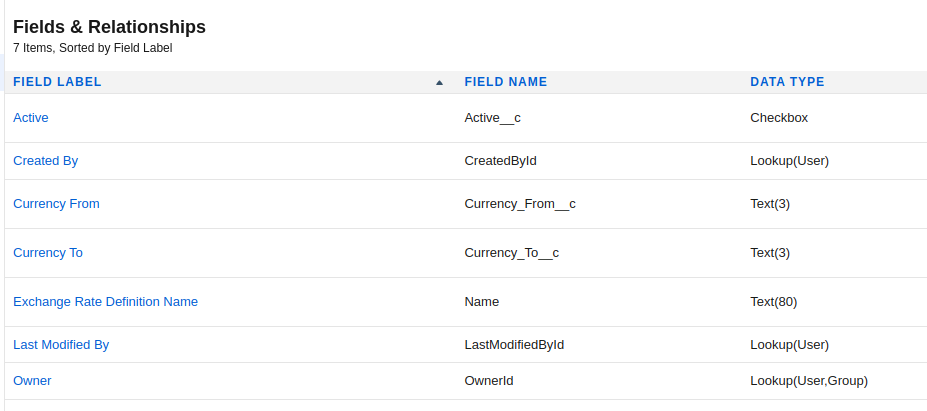
To easily manage which currencies we want to import, I want to create a custom object. It is called “Exchange Rate Definition” and this is its main structure:
And here is a sample record used for the EUR currency. We will consider USD as the base currency for our Salesforce org.

We don’t need a custom object to store the actual exchange rates, we’ll use the standard DatedConversionRate object for that.
Flow
Since DatedConversionRate (used to store the actual exchange rate) is a setup object, we will need a flow to insert records. Let’s create a Autolaunched flow with no trigger that we’ll use later with Declarative Webhooks to insert the exchange rate.
We need 3 input flow variables:
- ConversionRate (number, 4 decimals)
- IsoCode (text)
- StartDate (date)
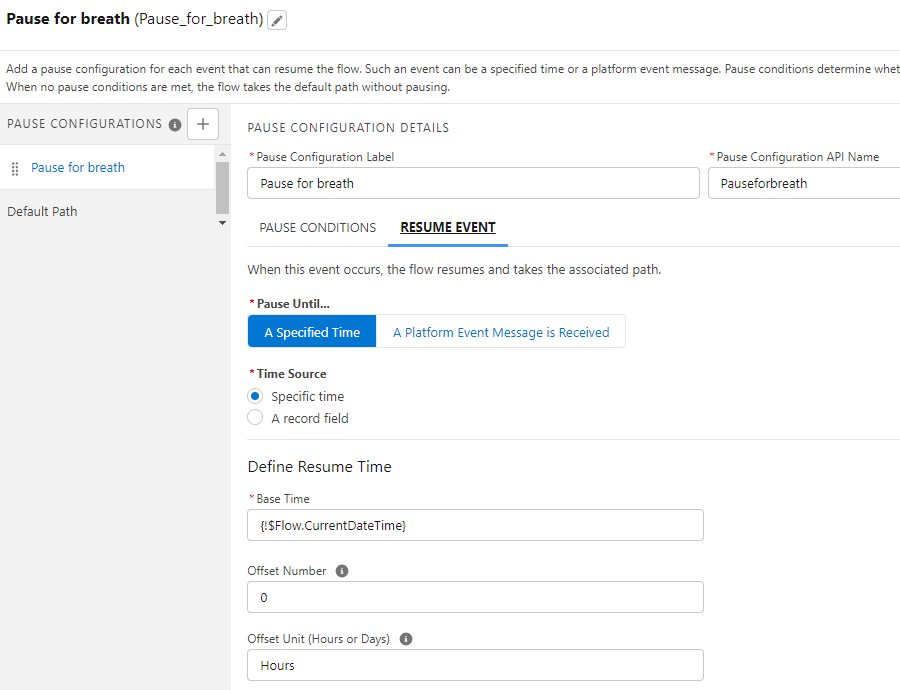
Then we start the flow with a Pause element. We need that because the DatedConversionRate we are about to insert is a setup object, and we need a separate transaction to do it. So go ahead and add a Pause element with no conditions and 0 Hours delay, like below:
After the pause element, we’ll add a Create Records element and we’ll set it up to create a DatedConversionRate record using the input variables we created earlier.

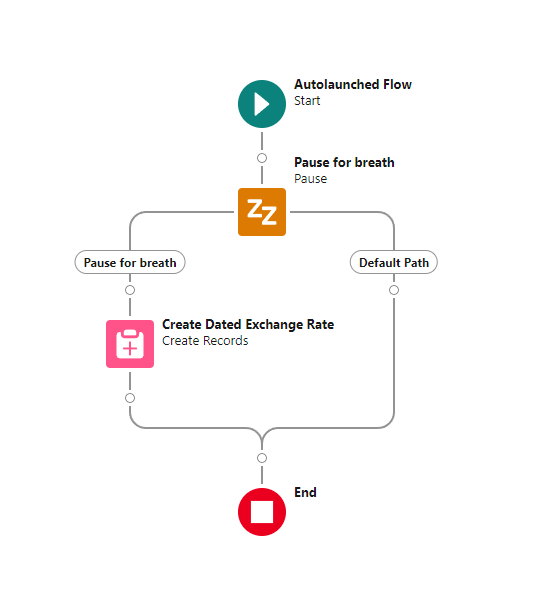
And that should be it. Your flow should now look like this:
Make sure to save and activate your flow and we’ll use it later.
Salesforce Callout Template to Exchange Rates API
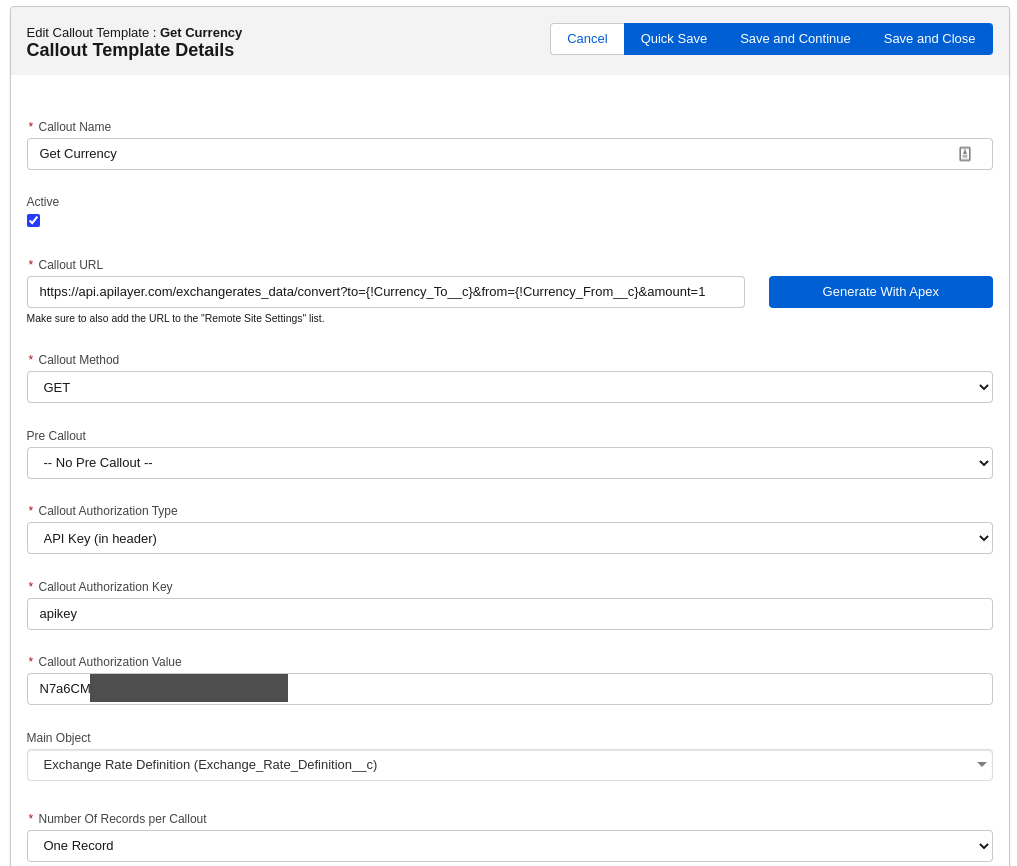
In order to implement a call that gets the exchange rate data, I have to create a Callout Template. Go to the “Callout Templates” tab in Declarative Webhooks and create a new one.
The Callout URL is the url of the REST API endpoint, taken from the API documentation. Since we are using Exchange_Rate_Definition__c as a main object of the call, we can map fields from the record into the URL with the {!…} format. Don’t forget to add the base of the URL to the Remote Site Settings section in Salesforce.
For authentication, the API documentation says we need to provide the API key in header, so I’ll choose that option in the “Callout Authorization Type”.
After selecting the main object as Exchange_Rate_Definition__c, we go to the next step by clicking “Save and Continue”.
The second step is the list of headers. There is no additional header requested by this API, so we’ll just Save and Continue.

The request body is not required for GET calls, so we’ll Save and Continue to the response definition page.
This is where you define how you expect the response JSON to look like. Looking at the documentation, we can find an example response. We can use that to generate the response format by using the “Create from sample JSON request” button. After importing the response, we should see the body in the page.

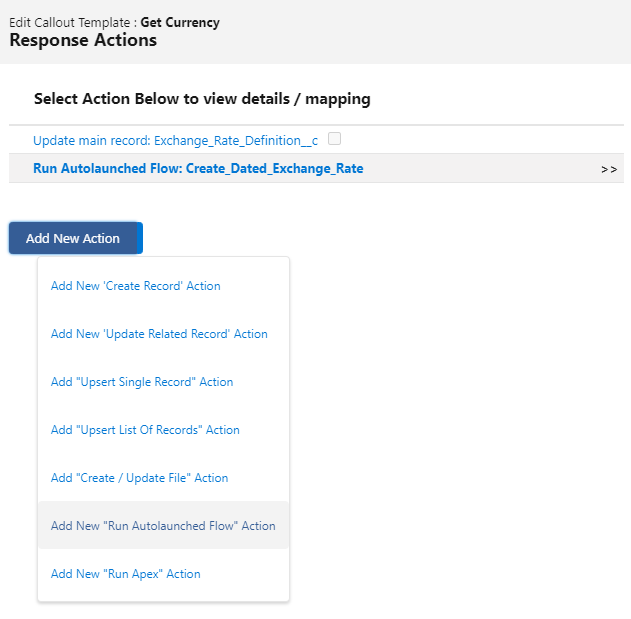
The next step is the response actions. We don’t need the main “Update main record” action, so we’ll leave it the way it is.
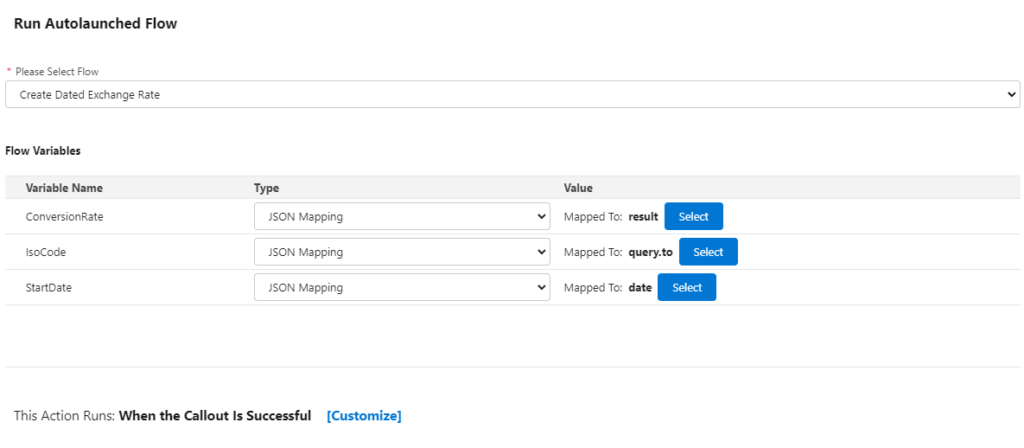
Instead, we want to call the flow we created earlier, so let’s add a new “Run Autolaunched Flow” action.
We need to select the flow we created earlier from the list and map the flow variables with the values from the response body. The action should look like this:
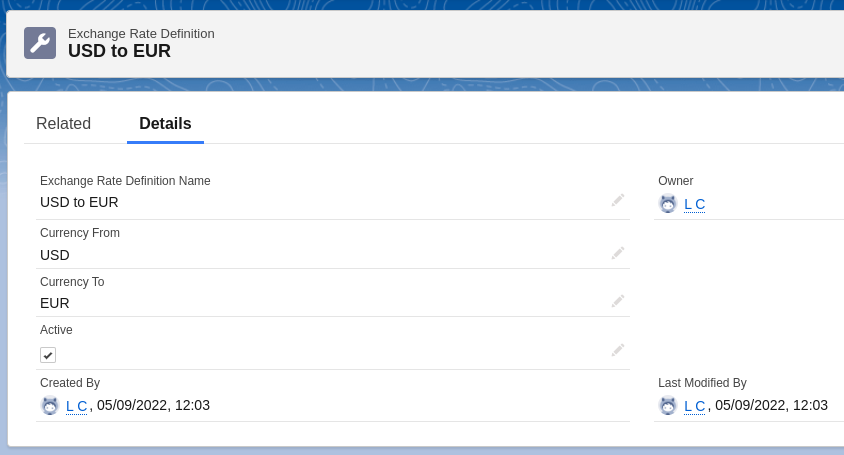
We finished defining the Callout Template. Let’s test it. In order to test, we create an Exchange Rate Definition record to convert from USD to EUR.
Now, on the callout template standard page, we need to click on the “Test Callout Template” button. That will take us to a test page where you can choose a test record (our new Exchange Rate Definition record) and see the generated request details, and then the actual response. If all went well, you should see the successful response:

Schedule to extract daily exchange rates
Now, in order to make this template run daily and extract the data for us automatically, we need to schedule it. Declarative Webhooks makes that easy with the Scheduled Jobs functionality.
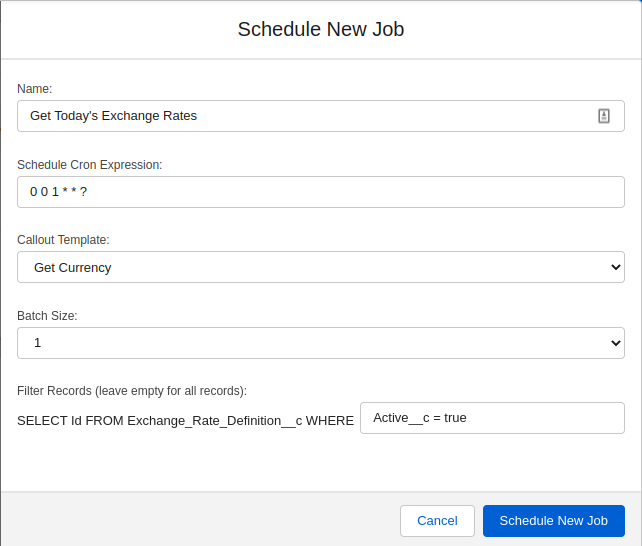
Go to the Administration tab, then select the “Scheduled Jobs” subtab. After clicking “Schedule New Job”, you should be able to enter the details.
First, add a Name for the job, something easy to remember and descriptive of what it does. The Schedule Cron Expression is where you define when and how often the job will run. In our case, “0 0 1 * * ?” means it runs daily at 1AM. More info about how CRON expression works.
Next you can select the template to run and the batch size. Since our template does not accept multiple records, we only have “1” as option for batch size. Don’t worry, it will run for ALL active definition records. In the filter below we add a condition to make sure we only run it for records where Active__c is checked
You scheduled job should look like below:
Once you click “Save”, the job is ready and scheduled and it will run daily at 1am.
Conclusion
We’ve written absolutely no code, and yet we are able to implement an exchange rates integration with an external REST API. That is the power of Declarative Webhooks.
Thank you for following this quick guide.
If you want to learn more about Declarative Webhooks, please follow the links below:

Download Declarative Webhooks from the Appexchange

Declarative Webhooks User Guide

Declarative Webhooks Video Demo

Book a Declarative Webhooks Demo
More Integration Guides
© Omnitoria, All Rights Reserved.